10) Tyre conundrum
- Chris Stanley
- Sep 14, 2019
- 3 min read
Life would be boring if everything was easy.
September 13th 2019

I went to collect my wheels from the tyre fitter this morning but all was not plain sailing. Two of the original tyres had inner tubes fitted and the other two were tubeless and had valve stems fitted through the wheels. The latter two were no problem as they could use the original valves, however the other two certainly were, for a very unexpected reason. It seems that the early Minor wheels had larger valve stem holes than the modern standard of 12mm and modern stems are too small to seal against air leakage. They fitted one of those tyres by using the original inner tube but the last wheel had a damaged tube and therefore couldn't be replaced. I told them I'd try to source some wider valve stems and return to have the last tyre fitted. I didn't realise how hard they'd be to find and ended up ordering a set from America! It will probably be more than two weeks until I get them so my next test drive will have to wait a while.

I like to mix the more awkward jobs with the easier ones and the next job was one of the easiest of them all. Just a simple bulb replacement in the number plate light and also clean up the fitting a little.

Next was a job I'd been putting off for a while, replacing the old perished coolant bypass hose which connects the underside of the thermostat housing with the top of the water pump housing. The old one came out easily enough and I genuinely thought I'd be able to wrestle the new one into place the same way, but no such luck. It's just too stiff and I wouldn't be able to do it without damaging it. A little browse through the owners club forum revealed that to do this job I either had to remove the cylinder head or the water pump! Oh joy...

Well as for the cylinder head... No. I'm not opening that particular can of worms so it looks like it's the water pump. Of course, to remove that I have to first drain off the coolant (again), then unbolt the dynamo which is attached to the pump housing, then remove the radiator and fan belt and finally remove the water pump. Sigh...


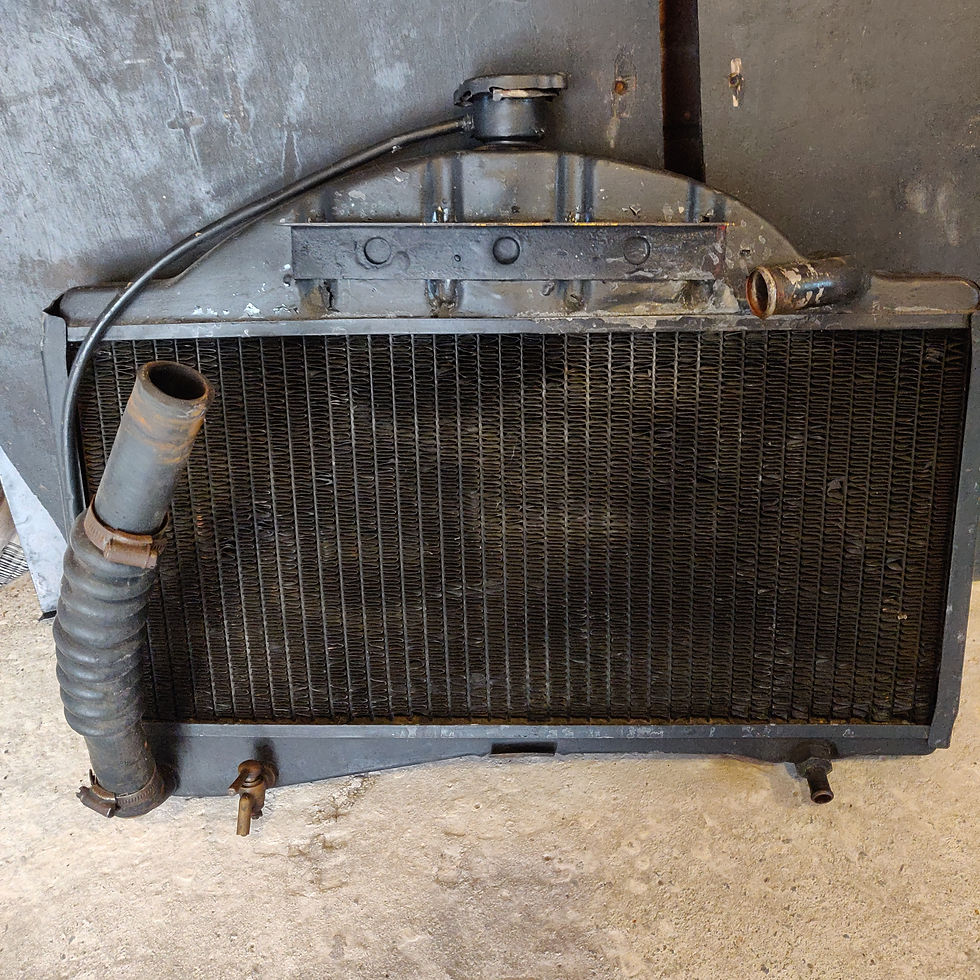
Once the coolant was drained off I disconnected the radiator hoses and undid the two top bolts. I noticed that the bottom left bolt had been sawn off sometime in the past and the bottom right bolt was just turning and not coming out. That meant I had to saw that off too! I now have a radiator with no bottom fixings so I'll have to find a way to rectify that when it comes to refitting.


I then disconnected the battery, unbolted the dynamo and removed the fan belt which finally gave me decent access to the water pump. A few minutes of spannering later and a little light persuasion with a hammer and it started to come loose.
It looks like someone used a whole tube of silicone sealant around the gasket when they fitted this pump so I had to spend a few minutes cleaning it up properly. I ordered a replacement gasket and will have to wait for that to arrive before I can refit it.

I'm pleased to say that although it's a little grimy, the pump looks like it is in very good condition with no play in the bearings at all. It just needs a little bit of cleaning up and I'm more than happy to refit it when I receive a new gasket.
Until the new gasket arrives I've gone as far as I can with that job so I decided to do something else that I'd been putting off for a while. Replacing the worn choke cable which won't stay in the 'out' position. A new one had recently arrived in the post so I made a start removing the old one. Naturally it was a very awkward and fiddly job as I had to remove the glove box liner and also the centre dashboard trim in order to access the fixing bolt behind the cable. Once that was loosened off, I disconnected the other end from the carburettor and slid the cable out.
Fitting the new one was slightly easier but first I dribbled a little light oil into the fitting as it was quite stiff to operate. Once everything was fixed into place it seemed to work perfectly so I'm looking forward to be able to use it once my engine is back together!


Comments